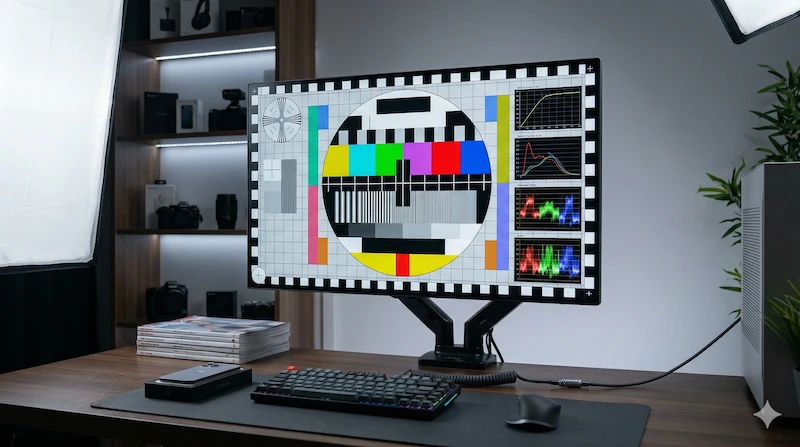
Monitor Calibration Guide
If you have ever printed a photo that looked perfect on screen but came out too dark or with a color cast, your monitor was not calibrated. If your video edits look great on your display but washed out on other screens, calibration is the solution. A properly calibrated monitor is the foundation of any color-critical workflow—and even for everyday use, calibration ensures you are seeing content as its creators intended.
This guide walks you through the complete calibration process, from understanding what calibration actually does to performing a professional-grade hardware calibration. We also cover how to verify your calibration is working correctly using our free display test tools.
1. What Monitor Calibration Actually Does
Calibration adjusts three fundamental display characteristics to match target standards:
- White Point (Color Temperature): The color of "pure white" on your display. The industry standard is D65 (6500K), which appears as a neutral white. Uncalibrated monitors often default to 9300K (very blue-white) or 5000K (warm yellow-white).
- Gamma: The relationship between the numerical value of a pixel and its actual brightness on screen. The standard gamma is 2.2 for SDR content. Incorrect gamma makes images look too dark (gamma too high) or washed out (gamma too low).
- Color Gamut and Accuracy: How accurately your monitor reproduces specific colors. Measured as Delta E (ΔE)—a value below 2.0 is considered imperceptible to the human eye, while values above 4.0 are clearly visible.
Calibration creates an ICC color profile—a file that tells your operating system how to compensate for your monitor's specific characteristics. Applications like Photoshop, Lightroom, and Chrome use this profile to adjust their output so colors appear correctly on your specific display.
2. Software Calibration: The Free Approach
Both Windows and macOS include built-in calibration tools that can significantly improve your display's accuracy without any additional hardware. While not as precise as hardware calibration, software calibration is a substantial improvement over factory defaults.
Windows Display Color Calibration
- Open Settings → System → Display → Advanced display settings → Display adapter properties
- Click the "Color Management" tab, then "Color Management..."
- In the Color Management window, click "Calibrate display"
- Follow the wizard to adjust gamma, brightness, contrast, and color balance
- The wizard uses visual test patterns—adjust until the patterns look correct
macOS Display Calibrator Assistant
- Open System Preferences → Displays → Color tab
- Click "Calibrate..." to open Display Calibrator Assistant
- Enable "Expert Mode" for more precise control
- Follow the multi-step process to set native gamma, target gamma (2.2), and white point (D65)
- Save the resulting ICC profile with a descriptive name
3. Hardware Calibration: Professional Accuracy
Software calibration relies on your eyes to judge test patterns—a subjective process that varies between individuals and lighting conditions. Hardware calibration uses a colorimeter or spectrophotometer to objectively measure your display's output and create a mathematically precise ICC profile.
Recommended Hardware
- X-Rite i1Display Pro Plus ($249): The industry standard for professional monitor calibration. Measures luminance, color accuracy, and creates profiles for SDR and HDR workflows.
- Datacolor SpyderX Pro ($169): Excellent value for photographers and videographers. Slightly less accurate than the i1Display but sufficient for most professional work.
- Datacolor SpyderX Elite ($229): Adds video calibration features and room light compensation. Recommended for video editors.
- X-Rite ColorMunki Display ($149): Entry-level hardware calibration. Good for photographers who need better accuracy than software calibration but don't require professional-grade precision.
Hardware Calibration Process
- Install calibration software: X-Rite i1Profiler or Datacolor Spyder software. These guide you through the entire process.
- Set target parameters: White point D65 (6500K), gamma 2.2, luminance 80-120 cd/m² for print work or 120-160 cd/m² for screen-only work.
- Attach the colorimeter: Place the device against the screen surface. Most colorimeters use a counterweight to hold themselves in position.
- Run the measurement sequence: The software displays hundreds of color patches while the colorimeter measures each one. This takes 5-15 minutes.
- Generate and save the ICC profile: The software creates a profile based on the measurements. Save it with a date in the name (e.g., "Dell U2722D 2026-04-16").
- Assign the profile: Set the new profile as your monitor's active profile in your OS color management settings.
4. Calibration Settings for Different Use Cases
Photography and Print Work
- White point: D65 (6500K)
- Gamma: 2.2
- Luminance: 80-100 cd/m² (matches typical print viewing conditions)
- Color space: sRGB for web delivery, Adobe RGB for print
- Recalibrate every 2-4 weeks (LCD backlights drift over time)
Video Editing
- White point: D65 (6500K)
- Gamma: 2.4 (BT.1886 standard for video)
- Luminance: 100-120 cd/m²
- Color space: Rec. 709 for broadcast, DCI-P3 for cinema
- HDR mastering: ST 2084 (PQ) curve, target 1000 nits peak
Gaming and General Use
- White point: D65 (6500K) or slightly warmer (6000K) for comfort
- Gamma: 2.2
- Luminance: 150-200 cd/m² (higher for bright rooms)
- Color space: sRGB mode if available
- Recalibrate every 3-6 months
5. Verifying Your Calibration
After calibrating, verify the results using standardized test patterns. Our Display Test tool provides several useful verification tests:
- Gray gradient test: A smooth gradient from black to white should show no banding or posterization. Banding indicates incorrect gamma or bit depth issues.
- White uniformity: Use our white screen test to check for color uniformity. A well-calibrated monitor should show consistent white across the entire panel.
- Black level: Use our black screen test to verify black levels. Near-black gradients should be distinguishable without crushing to pure black.
- Color accuracy: Display a known reference image and compare against a printed proof or reference monitor.
6. Common Calibration Mistakes
Calibrating in the Wrong Lighting
Your calibration environment affects the result. Calibrate in the same lighting conditions you work in. If you edit photos in a room with warm incandescent lighting, calibrate there. If you work in a daylight-balanced studio, calibrate there. Some advanced colorimeters include ambient light sensors that compensate for room lighting automatically.
Setting Luminance Too High
Many users calibrate at 200-300 cd/m² because it looks bright and vivid. For print work, this is a serious mistake—prints are viewed at 80-100 cd/m² in typical gallery lighting. A monitor calibrated at 250 cd/m² will make prints look dark and muddy by comparison. Match your luminance to your output medium.
Ignoring Monitor Warm-Up
As mentioned earlier, LCD backlights shift during warm-up. Always allow 30 minutes before calibrating. OLED displays are more stable from cold start but still benefit from a 10-minute warm-up period.
Not Recalibrating Regularly
LCD backlights degrade over time, shifting toward blue as phosphors age. A monitor calibrated 6 months ago may have drifted significantly. Professional workflows require monthly recalibration; casual users should recalibrate every 3-6 months.
7. Monitor OSD Settings Before Calibration
Before running calibration software, configure your monitor's on-screen display (OSD) settings correctly. Incorrect OSD settings limit what calibration software can achieve:
- Color mode: Set to "Custom" or "User" mode. Preset modes like "sRGB" or "Movie" may lock out adjustments.
- Sharpness: Set to 50% (neutral). Sharpness processing can affect color accuracy measurements.
- Contrast: Set to 75-80%. Avoid maximum contrast, which clips highlights.
- Brightness: Adjust to achieve your target luminance (80-120 cd/m² for most work).
- Color temperature: Set to 6500K if available, or "User" mode to allow RGB gain adjustments.
- Dynamic contrast / HDR: Disable all dynamic features during calibration.
8. Understanding ICC Profiles
An ICC (International Color Consortium) profile is a standardized file format that describes your monitor's color characteristics. When a color-managed application displays an image, it reads both the image's embedded color profile and your monitor's ICC profile, then converts the colors to display correctly on your specific screen.
Not all applications are color-managed. Web browsers like Chrome and Safari are color-managed and will use your ICC profile. Applications like Windows Paint or many video players are not color-managed and will display colors without profile compensation. This is why the same image can look different in different applications on the same calibrated monitor.
For professional work, always use color-managed applications: Adobe Photoshop, Lightroom, Premiere Pro, DaVinci Resolve, and Affinity Photo all support ICC profiles correctly.
Sources & Further Reading
- ICC Profile Specification — International Color Consortium
- VESA DisplayHDR Performance Criteria
- BlackScreen.live Display Test — verify calibration with standardized test patterns
- Color Accuracy Testing Guide — measuring Delta E and color gamut
- PPI Calculator — determine optimal viewing distance for your calibrated display